
5D Tactical Jig Instructions: A Comprehensive Guide
5D Tactical’s jigs offer foolproof completion of popular frames, aiding accurate machining of 80 lowers with detailed assembly, drilling, and milling guidance.
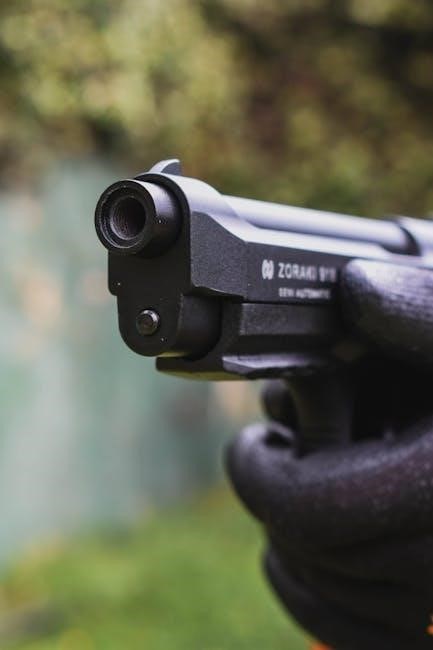
5D Tactical has rapidly become a leading innovator in the 80% lower receiver world, renowned for its precision-engineered jigs. These jigs are designed to empower individuals to confidently and accurately complete their own firearm lowers at home. The core philosophy behind 5D Tactical is to simplify a complex process, making it accessible to both beginners and experienced gun enthusiasts.
Their jigs, like the Pistol Jig Pro, are multi-platform, ensuring compatibility with a wide array of 80% lower receivers. The company prioritizes foolproof operation, providing a robust system that minimizes errors and maximizes success. 5D Tactical doesn’t just sell a product; they offer a pathway to understanding and building, backed by comprehensive support and resources.
Understanding 80% Lowers
An 80% lower receiver is an unfinished component, typically made of aluminum, requiring machining to be fully functional. They are legally distinct from fully manufactured firearms, allowing individuals to create their own receivers under specific regulations. The “80%” refers to the amount of machining still required to complete the receiver – typically around 20%.
Using a 5D Tactical Jig ensures precision and compliance during this crucial machining process. It’s vital to understand federal, state, and local laws regarding 80% lowers before beginning any project. These laws can vary significantly. Completing an 80% lower requires specific tools and a commitment to safety and accuracy, which the 5D Tactical system is designed to facilitate.
Jig Models and Compatibility
5D Tactical offers several jig models, including the Pistol Jig, Router Jig, and Router Jig PRO, each designed for specific receiver types and machining methods. The Pistol Jig is ideal for basic receiver completion, while the Router Jig and PRO versions offer increased versatility and precision using a router.
Compatibility extends to a wide range of 80% lowers, including AR-15 and AR-308 platforms. The Router Jig PRO is particularly noted for its multi-platform design. Always verify compatibility with your specific lower receiver before starting. 5D Tactical provides resources and support to help determine the correct jig for your needs, ensuring a secure and accurate fit.
Parts List and Inventory
A complete 5D Tactical Jig package typically includes the jig body, side plates, buffer plate, takedown pin installation tools, and necessary hardware like bolts and pins. Replacement parts, such as drill bushings and clamping components, are also available for purchase separately.
Before beginning assembly, carefully inventory all parts against the included parts list. Ensure you have all necessary components to avoid delays. 5D Tactical offers replacement part kits for common wear items. Maintaining a spare set of drill bushings is recommended. A well-organized inventory streamlines the build process and minimizes frustration.
Tools Required for Assembly
Successful 5D Tactical Jig assembly and operation necessitate specific tools. A drill press is highly recommended for precision, even a smaller harbor freight model suffices. Essential items include a set of drill bits – specifically those designed for metal – and a suitable vise for secure jig clamping.
Additionally, you’ll need wrenches or sockets to tighten hardware, screwdrivers for minor adjustments, and potentially a mallet for gentle component seating. Deburring tools are crucial for finishing operations. Safety glasses are mandatory throughout the process. A router and appropriate bits are needed for Router Jig PRO models.

Jig Assembly Process
Jig assembly begins with cleaning the 80% receiver surface, followed by buffer plate installation and loosely securing takedown pins for proper alignment.
Step 1: Cleaning the Receiver Surface
Prior to jig assembly, meticulous cleaning of the 80% receiver surface is paramount for optimal results. Any debris, oil, or machining residue can impede proper clamping and alignment, leading to inaccuracies during drilling and milling operations.
Utilize a solvent, such as isopropyl alcohol, and a clean lint-free cloth to thoroughly wipe down the entire surface where the jig will make contact. Ensure complete removal of all contaminants. A clean surface guarantees a secure and precise fit within the 5D Tactical jig, contributing significantly to the overall accuracy of the build. This foundational step is crucial for achieving professional-grade results and avoiding potential issues later in the process.
Step 2: Installing the Buffer Plate
Following surface preparation, the installation of the buffer plate is the next critical step. The buffer plate provides a stable and secure foundation for the receiver within the 5D Tactical jig. Carefully align the buffer plate with the designated recess in the jig, ensuring it sits flush and level.
Typically, the buffer plate is secured using screws or pins – consult your jig’s specific instructions for the correct hardware and tightening sequence. Do not overtighten, as this could damage the plate or the jig itself. A properly installed buffer plate is essential for maintaining consistent alignment throughout the machining process, directly impacting the final product’s functionality and reliability.
Step 3: Loosely Installing the Takedown Pins
With the buffer plate secured, the next phase involves the preliminary placement of the takedown pins. These pins are crucial for the structural integrity of the lower receiver. Insert the takedown pins into their respective holes within the 80% lower, but do not fully tighten them at this stage.
The pins should be snug enough to remain in place during jig assembly, but loose enough to allow for minor adjustments. This initial looseness accommodates potential variations in receiver dimensions and ensures proper alignment during clamping. Refer to the 5D Tactical documentation for the correct pin orientation and any specific recommendations regarding initial tightness.
Step 4: Jig Assembly and Clamping
Now, carefully position the 5D Tactical jig over the 80% lower receiver, ensuring the receiver is fully seated within the jig’s framework. Align the jig’s components with the corresponding features on the receiver, paying close attention to the takedown pin locations and buffer plate alignment.
Once aligned, securely clamp the jig assembly in a vise. Ensure the right side plate faces upwards for optimal access during drilling and milling operations. Tighten the vise firmly, but avoid over-tightening, which could damage the jig or the receiver. A stable and secure clamping setup is paramount for achieving accurate results.
Drilling Operations
Precise drilling is crucial; begin with the trigger guard, safety selector, magazine catch, and bolt catch holes, following the 5D Tactical jig’s guidance.
Drilling the Trigger Guard Hole
Initiating the drilling process, carefully position the 5D Tactical jig, ensuring secure clamping within a vise. Select the appropriate drill bit size as specified in the jig’s documentation – accuracy is paramount. Begin drilling slowly and steadily, applying consistent pressure to prevent bit breakage or wandering.
Maintain a 90-degree angle throughout the drilling operation, frequently clearing chips to facilitate smooth cutting and prevent overheating. Monitor the drilling depth closely, referencing the jig’s markings to avoid drilling too deep. Once the hole is complete, deburr the edges thoroughly to eliminate any sharp protrusions. A clean, precisely drilled trigger guard hole is fundamental for proper firearm function and safety.
Drilling the Safety Selector Hole
Precise execution is key when drilling the safety selector hole using the 5D Tactical jig. Consult the jig’s instructions to identify the correct drill bit size for your specific 80% lower receiver. Securely clamp the jig in a vise, ensuring it remains stable throughout the drilling process.
Begin drilling slowly, applying even pressure and maintaining a perpendicular angle to the receiver surface. Regularly clear metal chips from the hole to prevent binding and overheating of the drill bit. Monitor the depth carefully, referencing the jig’s guides to avoid breakthrough. After completion, thoroughly deburr the hole’s edges for a smooth, safe operation of the safety selector.
Drilling the Magazine Catch Hole
Accurate placement of the magazine catch hole is crucial for proper magazine function. The 5D Tactical jig provides precise guidance; verify the correct drill bit size specified for your 80% lower receiver. Ensure the jig is firmly clamped in a vise before initiating the drilling process, maintaining stability throughout.
Start drilling slowly, applying consistent pressure and keeping the drill bit perpendicular to the receiver. Frequently remove metal shavings to prevent bit binding and overheating. Carefully monitor the drilling depth, utilizing the jig’s markings to avoid drilling through the receiver. Following completion, meticulously deburr the hole’s edges to ensure smooth magazine insertion and retention.
Drilling the Bolt Catch Hole
Precision is paramount when drilling the bolt catch hole, as misalignment can hinder bolt operation. The 5D Tactical jig accurately positions the drill, but double-check alignment before commencing. Utilize the recommended drill bit size for your specific 80% lower receiver model. Securely clamp the jig in a vise to prevent movement during drilling, ensuring a stable and safe working environment.
Begin drilling slowly, applying even pressure and maintaining a 90-degree angle. Regularly clear metal chips to prevent bit clogging and overheating. Monitor the drill depth closely, referencing the jig’s indicators to avoid breakthrough. After drilling, thoroughly deburr the hole to eliminate sharp edges and facilitate smooth bolt catch functionality.
Milling Operations
Milling with the 5D Tactical jig requires precision and the correct router bits to shape the upper and lower receiver areas, including the magazine well.
Milling the Upper Receiver Area
Milling the upper receiver area with the 5D Tactical jig demands careful attention to detail. This process involves precisely removing material to create the necessary contours for upper receiver compatibility. Ensure the jig is securely clamped in a vise before initiating any milling operations.
Utilize a router bit specifically designed for aluminum, and follow the 5D Tactical’s recommended depth of cut and pass strategy. Gradual material removal is crucial to prevent chatter and maintain accuracy. Regularly check the milled surfaces against specifications to verify proper dimensions.
Pay close attention to the areas where the upper receiver will interface with the lower, ensuring a snug and secure fit. Proper milling of this area is fundamental for a functional and reliable firearm.
Milling the Lower Receiver Area
Milling the lower receiver area is a critical step, demanding precision to ensure proper function and compliance. The 5D Tactical jig guides the router bit to accurately shape the receiver, creating essential features like the magazine well and trigger mechanism housing.
Securely clamp the jig and utilize appropriate router bits designed for aluminum. Employ a gradual milling approach, taking shallow passes to prevent overheating and maintain dimensional accuracy. Regularly inspect the milled surfaces, comparing them to the 5D Tactical’s specifications.
Focus on achieving clean, consistent cuts, particularly around the trigger guard and magazine release areas. A well-milled lower receiver is the foundation of a reliable and safe firearm.
Milling the Magazine Well
Milling the magazine well requires careful execution to guarantee proper magazine insertion and retention. The 5D Tactical jig precisely positions the receiver for accurate milling, creating the necessary dimensions and angles for various magazine types.
Utilize a suitable router bit and employ a step-by-step milling process, gradually deepening the well to the specified depth. Consistent bit speed and feed rate are crucial for a smooth, even finish. Regularly check the well’s dimensions with calipers to ensure they meet the required tolerances.
Pay close attention to the magazine release cut-out, ensuring it’s correctly positioned for seamless magazine ejection. A properly milled magazine well is vital for reliable operation.
Post-Milling Procedures
Post-milling involves deburring, finishing, test fitting components, and performing safety checks to ensure a functional and reliable 80% lower receiver.

Deburring and Finishing

After milling, meticulous deburring is crucial. Sharp edges and burrs created during machining can cause malfunctions and pose safety hazards. Utilize deburring tools – files, stones, or specialized deburring bits – to carefully remove these imperfections from all milled areas, including the trigger guard, magazine well, and safety selector hole.
Finishing enhances both aesthetics and function. Options range from simple sanding to more advanced techniques like polishing or applying a protective coating. Sanding smooths surfaces, while polishing creates a refined look. Coatings, such as Cerakote, provide corrosion resistance and improve durability. Ensure any applied finish doesn’t interfere with component fitment or operation.
Pay close attention to internal areas, ensuring smooth transitions and eliminating any obstructions. A clean, well-finished receiver contributes to reliable performance and a professional build.
Test Fitting Components
Before final assembly, thoroughly test fit all critical components. This step identifies potential issues early, preventing costly rework. Begin with the trigger group – trigger, hammer, and disconnector – ensuring smooth engagement and proper function within the receiver. Next, test fit the safety selector, verifying positive detents and easy operation.

The magazine catch and bolt catch require careful attention. Ensure the magazine catch securely locks magazines in place, while the bolt catch allows for smooth bolt manipulation. Finally, test fit the buffer and buffer spring, confirming proper length and retention.
Address any interference or binding immediately. Minor adjustments with files or sandpaper can resolve most fitment issues. A proper test fit guarantees a functional and reliable firearm.
Safety Checks and Inspections
Prioritize safety throughout the build process and especially during final inspection. Conduct a thorough function check of all components, ensuring proper operation of the trigger, hammer, safety selector, and magazine release. Verify the bolt catch securely locks the bolt back and releases smoothly.

Inspect all drilled and milled areas for burrs or sharp edges. Deburr any imperfections to prevent injury or malfunctions. Carefully examine the receiver for cracks or structural weaknesses. Ensure all pins are fully seated and secured with appropriate methods.
Always adhere to all federal, state, and local laws regarding firearm construction and ownership. A comprehensive safety check is paramount for responsible firearm ownership.

Troubleshooting Common Issues
Common problems include jig misalignment, drill bit breakage, and receiver fitment issues. Careful attention to detail and proper tool maintenance can resolve these challenges.
Jig Alignment Problems
Ensuring proper jig alignment is crucial for accurate drilling and milling. If experiencing alignment issues, first verify the jig is securely clamped in the vise, focusing on the edges of the side plates. Confirm the correct side plate – the RIGHT side – faces upwards during the initial setup.
Loose screws or an uneven vise surface can contribute to misalignment. Double-check all fasteners are tightened appropriately, but avoid over-tightening. A small shim may be necessary under the jig if the vise jaws aren’t perfectly parallel. Regularly inspect the jig for any signs of warping or damage, as this can also affect alignment. Precise alignment minimizes errors and ensures a functional receiver.
Drill Bit Breakage
Drill bit breakage is a common issue, often stemming from excessive force or incorrect speed. When using a drill press, start with a slow speed and gradually increase it, avoiding aggressive plunging. Ensure the drill bit is sharp and appropriate for the material – using dull bits requires more force, increasing breakage risk.
Applying cutting oil liberally during drilling reduces friction and heat, extending bit life. Avoid lateral pressure on the drill bit; maintain a perfectly perpendicular angle to the receiver surface. If a bit begins to bind, immediately stop and retract it, reassessing the setup. Using high-quality drill bits designed for metalworking is also highly recommended.
Receiver Fitment Issues
Receiver fitment problems can arise from variations in 80% lower manufacturing tolerances. Some lowers may require slight filing or sanding to achieve a perfect fit within the 5D Tactical jig; Carefully inspect the receiver for any burrs or imperfections that could interfere with proper seating.
Ensure the receiver is fully seated against all locating surfaces of the jig before proceeding with drilling or milling. If encountering resistance, avoid forcing the receiver; instead, identify the obstruction and address it gently. A small amount of grease on the jig’s locating surfaces can aid in smooth receiver insertion.

Jig Maintenance and Care
Regular cleaning and lubrication are vital for optimal jig performance. Replacement parts and kits are available from 5D Tactical, ensuring longevity and precision.

Cleaning and Lubrication
Maintaining your 5D Tactical Jig through consistent cleaning and lubrication is crucial for its longevity and precision. After each use, thoroughly remove all metal shavings and debris using a brush and compressed air. Pay close attention to the guide rails and clamping surfaces.
Apply a light coat of high-quality gun oil or lubricant to all moving parts, including the pins, slides, and threaded areas. This reduces friction and prevents corrosion. Avoid using excessive oil, as it can attract more debris.
Regularly inspect the jig for any signs of wear or damage. A well-maintained jig will consistently deliver accurate results and ensure a smooth building experience. Proper care extends the life of your investment and guarantees reliable performance.
Replacement Parts and Kits
5D Tactical understands that wear and tear are inevitable with frequent use. Therefore, they offer a comprehensive selection of replacement parts and kits to keep your jig functioning optimally. Commonly replaced components include drill bushings, clamping screws, and takedown pin guides.
Kits are available for specific jig models, providing a convenient and cost-effective way to replenish essential parts. Individual components can also be purchased separately to address specific needs. 5D Tactical’s website provides detailed diagrams and part numbers for easy identification.
Using genuine 5D Tactical replacement parts ensures compatibility and maintains the jig’s precision. Avoid using generic alternatives, as they may not meet the required specifications. Regularly inspecting your jig and replacing worn parts proactively will maximize its lifespan and accuracy.
5D Tactical Support and Resources
5D Tactical is committed to providing excellent customer support and a wealth of resources for jig users. Their official website, 5dtactical.com, serves as a central hub for information, including detailed FAQs, instructional videos, and downloadable manuals. A dedicated support team is available to answer questions and address technical issues via email or phone.
The 5D Tactical community forum is a valuable platform for users to connect, share experiences, and troubleshoot problems collaboratively. Numerous online tutorials and guides created by experienced users supplement the official documentation.
5D Tactical also maintains an active presence on social media, providing updates, announcements, and additional support. Regularly checking these resources can significantly enhance your jig experience and ensure successful builds.
Advanced Jig Techniques
Router Jig PRO features enhance precision, while drill presses offer superior control. Conversion kits expand jig versatility, enabling work on diverse 80% lower receiver platforms.
Using a Drill Press for Precision
Employing a drill press significantly elevates accuracy during critical drilling operations with the 5D Tactical Jig. Many users, even those with smaller harbor freight benchtop models, have successfully completed builds.
Securing the jig firmly within the drill press vise is paramount. Ensure the assembly is clamped by the edges of the side plates, with the right side plate facing upwards. This setup guarantees stability and minimizes unwanted movement during drilling.
Utilize appropriate drill bits and speeds recommended for the 80% lower receiver material. Consistent, controlled pressure is key to achieving clean, precise holes. A drill press provides a level of control difficult to replicate with handheld drills, reducing the risk of errors and improving overall build quality.
Router Jig PRO Features
The 5D Tactical Router Jig PRO represents a significant advancement in 80% lower receiver manufacturing. This versatile, multi-platform jig is engineered for foolproof operation across a wide range of popular frame types.
Key features include enhanced rigidity and improved alignment capabilities, resulting in greater precision and consistency. The PRO model often incorporates upgraded components and materials for increased durability and longevity.
Users benefit from simplified setup procedures and intuitive operation, even for those new to 80% lower builds. The Router Jig PRO streamlines the milling process, reducing the time and effort required to create a functional receiver. It’s a robust solution for both beginners and experienced builders.
Jig Conversion Kits
5D Tactical offers conversion kits designed to expand the functionality of your existing jig, allowing compatibility with a broader range of 80% lower receiver types. These kits provide a cost-effective alternative to purchasing an entirely new jig system.
Conversion kits typically include necessary adapters, pins, and hardware to modify the jig’s configuration. They enable users to build different receiver styles, such as pistol or carbine variants, using the same base jig.
These kits are designed for straightforward installation, often requiring minimal tools and technical expertise. 5D Tactical provides clear instructions and support to ensure a seamless conversion process, maximizing the versatility of your investment.